How to sharpen a knife with an electric sharpener
Imagine being able to restore your knives to their original sharpness , the same sharpness they had when they left the factory, simply by pressing a button. That's the promise of the electric knife sharpener. This device positions itself as the ultimate solution for anyone seeking perfect, fast, and consistent results, without the learning curve of using a whetstone.
The electric sharpener: for whom and for what? Advantages and disadvantages
Before plugging in your device, it's important to make sure it meets your needs and is compatible with your knives. Like any specialized tool, the electric sharpener has many advantages, but also some limitations you should be aware of.
The advantages (power at the service of simplicity)
- Consistent, professional results: Thanks to its integrated guides, the sharpening angle is predefined and perfectly maintained. This ensures an impeccable and repeatable result every time.
- Exceptional speed: This is undoubtedly the fastest method for restoring an edge, even on a very dull blade. The operation takes only a few minutes.
- Deceptively easy: The machine does all the work. Your role is limited to guiding the blade into the slots, without any effort or special technical skills.
The drawbacks (a power to be controlled)
- Aggressiveness: To be so effective, the electric sharpener removes material quickly. Therefore, overuse or incorrect use can wear down a blade faster than with other methods.
- Cost and size: It represents a larger investment than a manual sharpener or a stone, and it takes up more space on a work surface or in a cupboard.
- Less versatile: As the angle is fixed, it is not suitable for all types of knives, particularly very thin Japanese blades which require a smaller angle.
In conclusion, the electric sharpener is the perfect tool for passionate cooks, equipped with European knives, who are looking for maximum efficiency and consistent results without effort.


Understanding your machine: the role of each step (or slot)
Your electric sharpener functions like a miniature production line. It generally has several stages, represented by different slots, each with a specific and complementary function.
Step 1: Sharpening (coarse grit discs)
This is the "creation" stage. Inside these initial grooves are highly abrasive rotating discs, often coated with diamond dust. Their role is to remove material to create a new cutting edge on a blade that has become very dull. This is the most powerful stage and should only be used when necessary.
Step 2: Sharpening and polishing (fine grit discs)
This is the "finishing" stage. Here, the discs are much thinner, sometimes made of ceramic or flexible polymer. Their purpose is to polish the edge you have just created, to straighten it perfectly (sharpen it), and to remove the fine metal burr (the burr) to obtain a clean, smooth, and durable cutting edge.
Step 3 (on some models): Final polishing
The most advanced models sometimes offer a third stage. This uses even finer polishing discs or flexible discs for automated stropping (leather finishing). The result is a razor-sharp edge of extreme fineness.
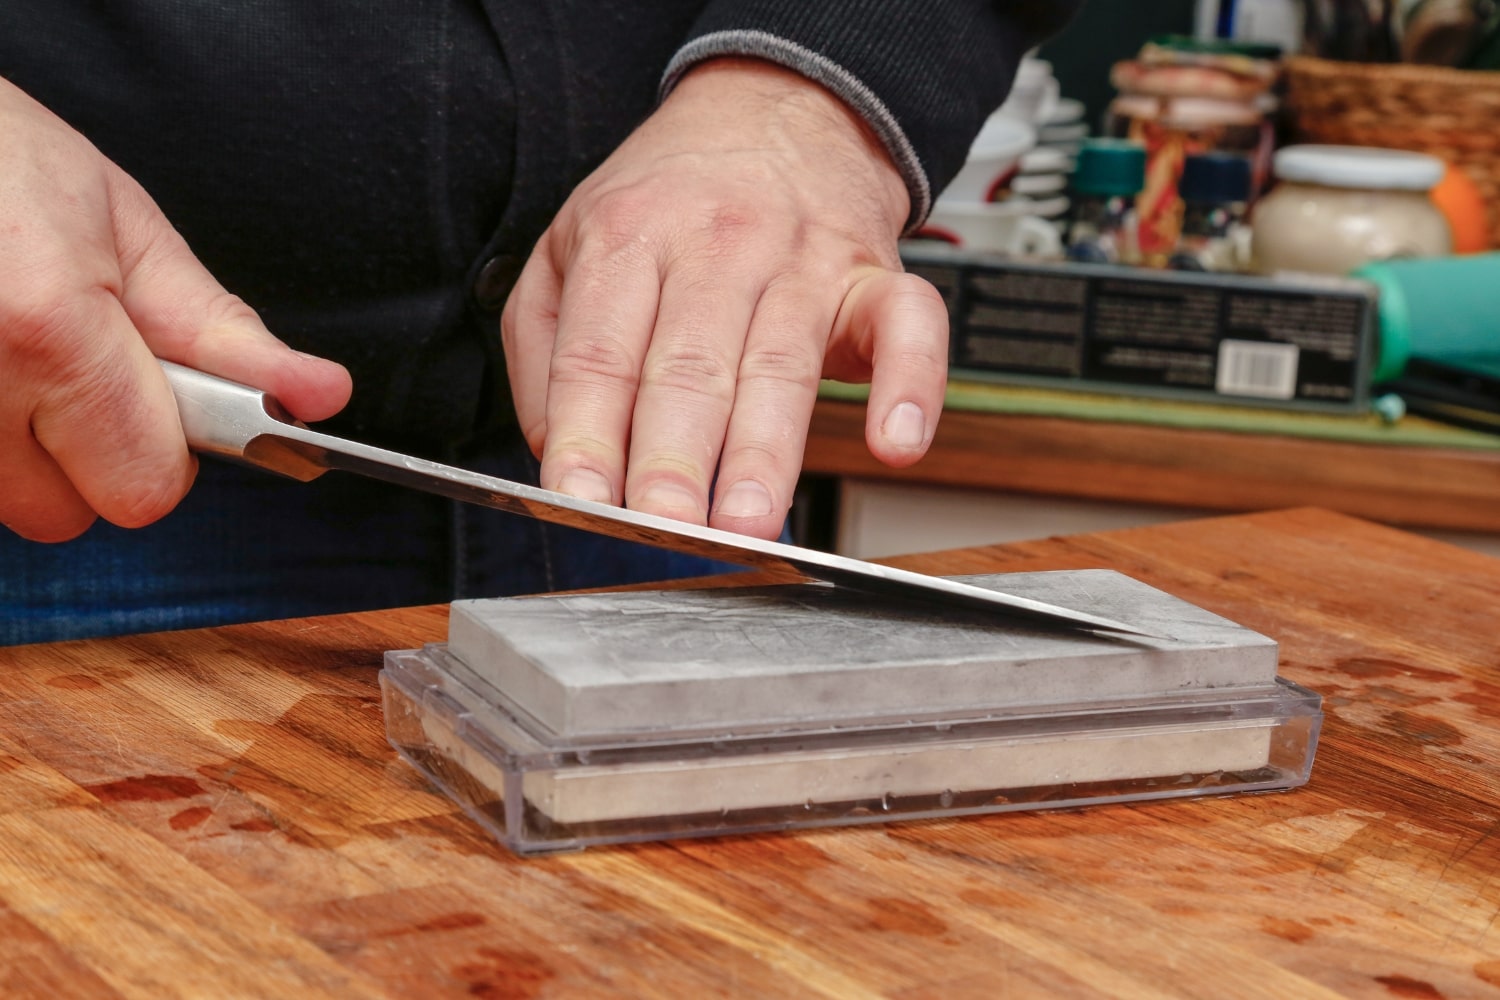
The foolproof method: sharpen your knife in 6 steps
The success of the operation depends not on strength, but on the fluidity and lightness of your movement. Your only role is to guide the blade; the machine takes care of the rest.
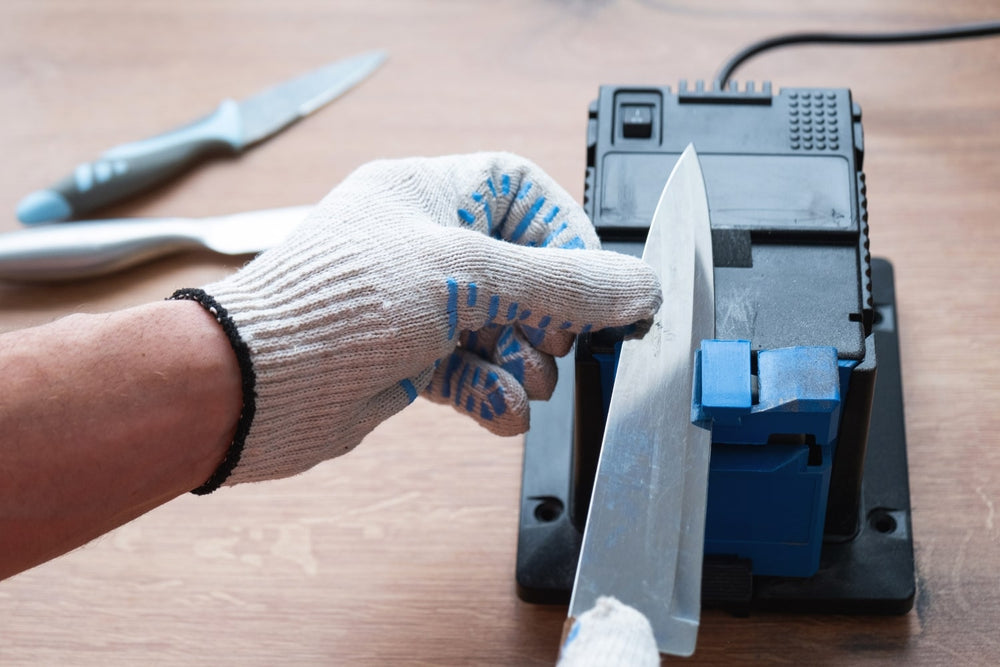
- Preparation and Safety: Place your machine on a flat, clean, and stable surface. Quickly read your model's manual, as slight variations may exist. Ensure your knife blade is clean and dry.
- To start, plug in and turn on the sharpener. You will hear the characteristic sound of the motors powering the discs.
-
Step 1 – Sharpening (if necessary) Only use this step if your knife is very dull. Most models have a left and a right slot to work each side of the bevel.
- Pull the blade through the left slot , starting at the heel (near the handle) and moving towards the tip. The movement should be smooth and consistent. Aim for approximately one second per 10 cm of blade.
- Immediately repeat the same movement in the right lunge .
- Alternate in this way on each side. One or two passes per side are usually sufficient.
-
Step 2 – Finishing Now proceed to the finishing slots. The process is the same.
- Pull the blade into the left slot, then into the right one.
- Repeat this alternation for a total of two to three passes per side , in order to polish the thread well.
- Stopping and cleaning the blade: Turn off the machine. This is a crucial step: the blade is now covered with a very fine, invisible metal dust. Wash it immediately with water, a sponge, and soap, then dry it thoroughly.
- Sharpness Test: Now is the time to admire your work. Perform the paper test: your knife should cut through it effortlessly.
Warning! Never put knives in an electric sharpener.
An electric knife sharpener is a specialized tool, not a universal one. Forcing an unsuitable knife into the machine can cause irreparable damage to both the blade and the device.
Here is a list of knives to keep away from your sharpener:
- High-quality Japanese knives: Their steel, often harder and more brittle, as well as their very fine sharpening angle (around 15°), are not compatible with the fixed angle (often 20°) and power of the machine.
- Serrated knives: You would destroy the serrations of your bread or steak knife unless your sharpener model has a manual function specifically designed for this purpose.
- Very thick knives: Cleavers or choppers that are too thick simply will not fit into the guide slots.
- Anything that is not a knife: Never attempt to sharpen scissors, screwdrivers, or other tools with this device.
Pro tips for a perfect result and a preserved blade
To get the most out of your machine while taking care of your knives, keep these few expert tips in mind.
- Lightness is key: Never press down on the knife when passing it through the slots. Simply guide it. The weight of the blade itself is sufficient.
- A constant speed: Try to maintain a steady pulling speed. Pulling too quickly will be inefficient, while pulling too slowly could cause the blade steel to overheat.
- Finish the motion all the way to the tip: Make sure you pull the blade all the way through so that the tip is also sharp. This is a common mistake that can round off the tip of the knife.
- Cleaning your sharpener: Over time, metal dust accumulates. Remember to periodically empty the small collection tray for the metal filings, which is often located under the device.
Conclusion: Professional performance at home
Ultimately, the electric sharpener stands out as the ideal solution for those seeking speed, ease, and consistency. It offers professional-quality sharpening without the technical constraints of traditional methods.
Remember, however, that this is a powerful tool that must be used with respect and care. By following the advice in this guide, you are now perfectly equipped to effortlessly maintain a kitchen with impeccably sharp knives. This promises increased safety and enhanced cooking pleasure every day.


une predefinition des fentes aurait été utile et astucieuse pour ne pas tatonner ou ségarer
daniel Gillon
This site is protected by hCaptcha and the hCaptcha Privacy Policy and Terms of Service apply.