How to sharpen your knife with a manual sharpener
Imagine being able to restore your chef's knife to a razor-sharp edge in under a minute, without any special skills. That's the promise of the manual sharpener. This ingenious tool is the perfect solution for anyone who finds sharpening stones too complicated or time-consuming, but who desperately wants to put an end to blades that crush instead of cut.
Why choose a manual sharpener? Advantages and limitations
Before you begin, it's important to understand what this tool can and cannot do for you. Knowing its strengths and weaknesses will allow you to use it wisely and determine if it's the right solution for you.
The advantages (why you'll love it)
The manual knife sharpener is highly praised for very good reasons, which make it a valuable ally in the modern kitchen.
- Extreme simplicity: Its greatest advantage is its ease of use. The sharpening angle is already fixed by the slots, so there is no calculation to be done or angle to guess.
- Unbeatable speed: Just a few passes through the slots are enough. The entire operation usually takes less than a minute.
- Maximum safety: Its design, with a handle to hold it firmly, ensures that your hands always remain away from the blade during the process.
- Compact and affordable: It takes up very little space in a drawer and its price is much more accessible than that of a quality set of stones.
The limitations (what you need to know)
In return for its great simplicity, the manual sharpener has some limitations that it is honest to mention.
- Less refined than a whetstone: Sharpening is effective, but more "aggressive." The resulting edge will be sharp, but less polished and durable than an edge honed on a fine whetstone.
- Single angle: The angle is predefined, often around 20 degrees per side. Therefore, it's not the ideal tool for knives that require a specific angle, such as Japanese knives.
- Blade wear: To be effective quickly, the sharpening slot tends to remove slightly more material than a stone. It must therefore be used judiciously.
In short, you hold in your hands the perfect tool for quick and highly effective daily maintenance. However, it is not intended for knife purists seeking the ultimate "razor-sharp" edge.


Anatomy of your sharpener: what are the different slots for?
To use your sharpener correctly, it's essential to understand that each slot has a specific function. Most good models have at least two slots, and using them in the correct order is key to achieving optimal results.
Slot #1 "COARSE" (or Coarse): to create the cutting edge
- Material: You'll recognize it by its small V-shaped blades, often a dark metallic grey. It's usually made of tungsten carbide, an extremely hard material.
- Role: This is the pure sharpening stage. These blades remove material to reform a cutting edge on a knife that has become very dull.
- When to use it? You will only use this slot occasionally, only when your knife is really no longer cutting.
Slot #2 “FINE” (or Finishing): for polishing and maintenance
- Material: This slot is made up of two small ceramic rods, most often white.
- Role: This is the finishing and maintenance stage. The ceramic, being less abrasive, will polish the thread you have just created, remove small imperfections (the burr) and straighten a thread that has simply been bent by use.
- When to use it? Always after passing through the "COARSE" slot, or alone for regular maintenance (for example, once a week) of a knife that still cuts relatively well.
The sharpening technique: a perfect result in 5 simple steps
Forget complicated techniques and hours of practice. The method for using a manual sharpener is simple, straightforward, and designed to be successful the first time. Simply follow these steps in the order shown.
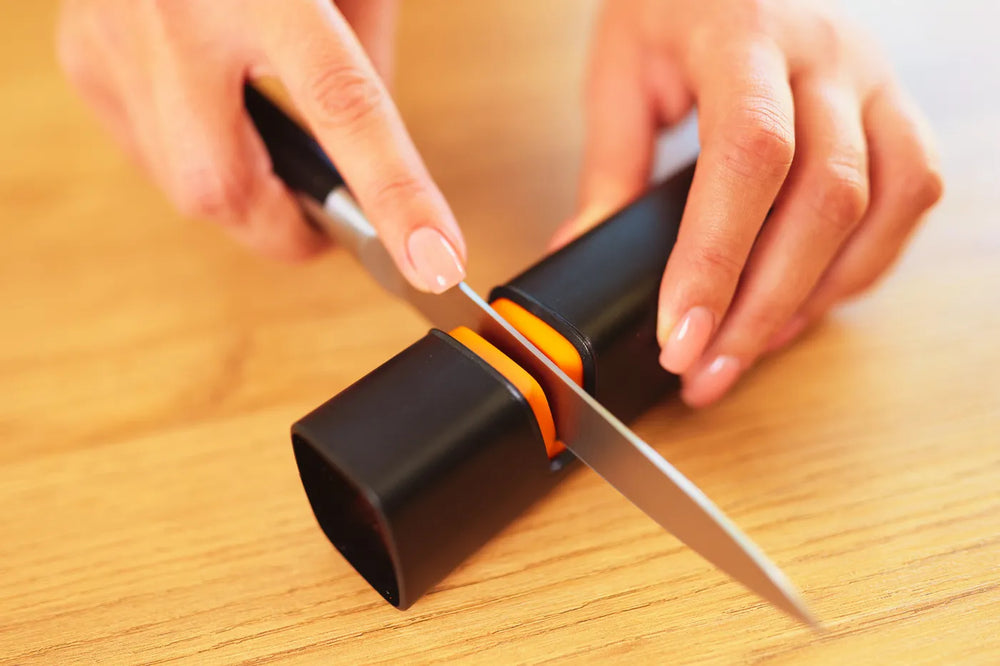
- Securing the sharpener: Place the tool flat on a table or work surface. Hold the handle firmly with one hand to ensure it is perfectly stable. It must not be able to slip.
- (If necessary) Sharpen using the "COARSE" slot. Hold your knife in your other hand. Insert the blade straight into the first slot ("COARSE"), starting at the heel (the part of the blade closest to the handle). Then pull the knife towards you, continuously and smoothly, to the tip. Apply light, steady downward pressure. Repeat this 3 to 5 times, no more.
- Polish with the "FINE" slot. Now move to the second slot ("FINE"). Repeat the exact same pulling motion, from heel to tip. As this step is less aggressive, you can make 5 to 10 passes here to thoroughly polish the edge.
- Cleaning the blade is a crucial and often overlooked step. Very fine metal particles, called filings, have accumulated on your blade. Rinse it thoroughly with water and wipe it with a clean cloth or paper towel to remove them.
- Testing the sharpness: The moment of truth! The paper test is ideal. Hold a sheet of paper and try to slice it from top to bottom. Your knife should cut the paper cleanly, without snagging or tearing it.
Knives that should NEVER be sharpened in a manual sharpener
To avoid irreversibly damaging your blades or sharpener, it's vital to know that this tool isn't universal. Some knives should never be sharpened.
Here is the list of "prohibited" items:
- Serrated knives (bread knives, steak knives, etc.): You would destroy the shape of the teeth and damage the grinding wheels of your sharpener.
- High-quality Japanese knives: Their steel is often very hard and brittle, and above all, their sharpening angle is much finer (between 12 and 17 degrees). A 20-degree angle on a sharpener would damage their very specific edge.
- Single-bevel blades: Some traditional Japanese knives or tools like wood chisels are sharpened on only one side. A sharpener that works both sides simultaneously is completely unsuitable.
- Scissors: Their cutting geometry is completely different. Do not attempt to sharpen them with this tool unless yours has a slot specifically designed for that purpose.
My knife still won't cut: FAQ and troubleshooting
Despite the tool's simplicity, sometimes the results fall short of expectations. If this is the case for you, here are the most common reasons and their solutions.
- "I've gone over it 20 times and it's still not cutting any better." You're probably pressing too hard. Heavy pressure doesn't improve sharpness; on the contrary, it worsens it. The pressure should be light and consistent. If the problem persists, your knife may be too damaged and require proper restoration on a whetstone.
- "The edge of my knife feels 'rough'." This almost certainly means you haven't made enough passes through the "FINE" (ceramic) slot after using the "COARSE" slot. Remember, this second step is essential for polishing the edge.
- "Can I use a back-and-forth motion in the slot?" Absolutely not! You must always pull the blade in one direction only, from the heel to the tip. A back-and-forth motion is completely ineffective and can even be dangerous.
Conclusion: Efficiency at the service of your everyday life
Ultimately, as you've seen, the manual sharpener is the ideal tool for anyone looking for quick, safe, and effortless maintenance. It proves that you don't need to be an expert to enjoy the comfort and safety of sharp blades.
No more crushed tomatoes and onions that make you cry before you've even chopped them. Thanks to this simple tool and guide, you now have the power to keep your knives perfectly functional, day after day. It's a small step for a huge amount of comfort in the kitchen.


This site is protected by hCaptcha and the hCaptcha Privacy Policy and Terms of Service apply.