

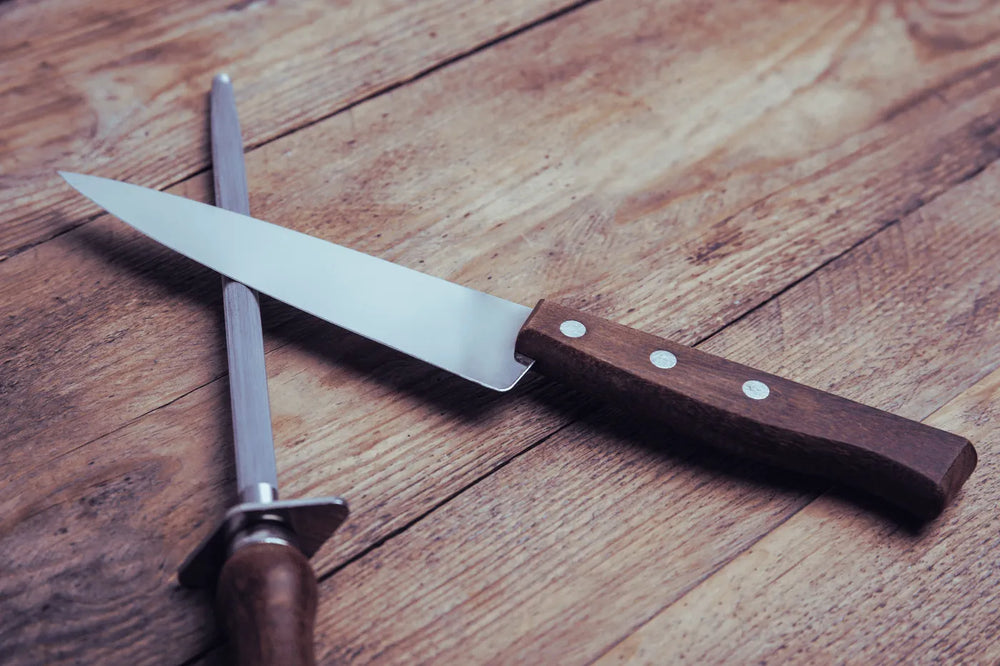
How to properly sharpen your knife with a sharpening steel
Sharpening a blade to a razor-sharp edge with a simple honing steel is an appealing promise. It's the hallmark of a professional, a mark of efficiency you're eager to master. However, the secret to this technique lies not only in the skill itself, but above all in choosing the right tool. Indeed, most honing steels available on the market are not designed for sharpening.
Choosing the right sharpening steel for effective sharpening
To begin, it's essential to understand that successful sharpening depends entirely on your tool. To remove steel and restore a dull edge, you absolutely need an abrasive surface. Only two types of sharpening steels meet this requirement.
The diamond sharpening steel: for powerful and fast sharpening
- Description: You'll recognize it by its rough surface, as if it were covered with a fine, sparkling powder. It's a metal rod coated with a layer of industrial diamond, the most abrasive material available.
- Action: This sharpening steel is very efficient and fast. It removes material with each pass to restore an edge, even on the dullest blades.
- Main use: This is the ultimate "repair" tool. You will use it to restore a knife that has completely lost its edge.
The ceramic sharpening steel: for fine and controlled sharpening
- Description: It comes in the form of a white or black rod, with a smooth but slightly porous appearance. Ceramic is an extremely hard material, which gives it moderate abrasive power.
- Action: This sharpening steel provides a gentle sharpening action . It removes significantly less material than diamond, making it perfect for precise finishing and regular maintenance without prematurely wearing down your blade.
- Main use: It is ideal for maintaining exceptional cutting performance on an already well-sharpened knife, or for the delicate maintenance of very hard steels such as those of Japanese knives.
Painting: diamond or ceramic, which rifle for you?
To help you make the right choice, here is a simple summary table.
| Characteristic | Diamond Rifle | Ceramic Rifle |
| Sharpening power | Very high | Light to medium |
| Ideal use | Restoring a very dull blade | Maintaining an already high-performing edge |
| Frequency of use | Occasional (repair) | Regular (maintenance) |
| Risk to the blade | High if misused | Weak |
In short, the choice is simple: if your knife is no longer a knife at all, a diamond will revive it. If you want it to remain in top condition, ceramic will be your best ally.


The sharpening technique explained step by step
Now that you know which tool to use, let's get practical. Technique is crucial, as an improper use of an abrasive tool can damage your blade. Remember that a light touch and consistency are your best friends.
Safety first: 3 golden rules
Before you begin, take a moment to fully understand these safety rules.
- Ensure your stability: Stand upright, firmly, and work on a dry, non-slip surface.
- Protect your fingers: The hand holding the rifle must always remain behind the handguard. Never let your fingers venture beyond it.
- Control your movements: Go slowly. Speed is your enemy, precision is your goal.
The perfect technique in 4 steps (vertical method)
The vertical method is the safest and easiest way to guarantee a constant angle. We highly recommend it.
- Positioning: Hold your rifle vertically, with the tip firmly resting on a cutting board. This ensures perfect stability.
- The constant angle (15-20°): Place the base of your blade (the part closest to the handle) at the top of the sharpening steel. Tilt the knife to create an angle of approximately 15 to 20 degrees between the blade and the steel. To visualize this, it's roughly the thickness of a stack of two coins.
- Ultra-light pressure: This is the secret to successful sharpening. Apply almost no pressure. The weight of the blade is enough. Let the abrasive do its work. Forcing it will only wear down your knife and create a poor edge.
- The movement and alternation: Slide the blade downwards and towards you in an arcing motion, so that the entire length of the cutting edge passes over the gun, from base to tip. Then repeat the same movement on the other side of the gun.
Pro tip: Listen to the sound of the sharpening
Close your eyes and listen. A soft, regular, and steady sound, a light "shh," indicates that your angle and pressure are correct. If you hear a "crack" or a choppy sound, your movement is too abrupt or your angle is incorrect.
When and how often should you use your sharpening steel?
Sharpening, as we've said, is a corrective action. Using it indiscriminately is the best way to shorten the lifespan of your knives. It's therefore essential to know when to sharpen them.
The telltale signs: your knife needs sharpening
Rely on these simple tests to make your diagnosis:
- The knife crushes the skin of a tomato instead of biting into it.
- He tears a sheet of paper instead of cutting it cleanly.
- It glides across the surface of an onion without being able to easily cut into it.
If you recognize any of these symptoms, a sharpening session is necessary.
The sharpening calendar
The frequency depends directly on the type of rifle you are using.
- Diamond Sharpening Steel: Reserve it for occasional use. It's a powerful restoration tool. Using it too often would unnecessarily dull your blade. Once every few months, or even less, is more than enough.
- Ceramic Honing: You can use it more regularly . It's perfect for maintaining peak performance without damaging the blade. Depending on how often you use your knives, honing once a week or once a month is a good routine.
Conclusion: a power to be used wisely
You now have all the information you need to truly sharpen your knife with a honing steel. You know that this skill rests on two pillars: choosing the right tool – a diamond or ceramic steel – and mastering a technique where lightness and consistency take precedence over strength.
Never forget that sharpening is a powerful action. By using it wisely, you'll breathe new life into your blades and rediscover the pleasure of a perfect cut. Practice with a light and controlled movement, and you'll enjoy exceptionally sharp knives for a long time.


This site is protected by hCaptcha and the hCaptcha Privacy Policy and Terms of Service apply.