How to chop garlic
Ah, garlic! An essential ingredient in so many recipes. But let's be honest, have you ever stood in front of a clove of garlic and wondered, "How am I going to chop this up quickly without spending all day on it?" You're not alone! Chopping garlic can seem intimidating at first, but once you get the hang of it, it's a breeze. So, let me guide you step by step to becoming a garlic-chopping pro.
Why chopping garlic properly makes all the difference
Before diving into the technique, you might be wondering why it's important to chop garlic finely. Simply because the size of the garlic pieces will influence the flavor and intensity it brings to your dish. The finer the pieces, the more the garlic releases its aroma and blends harmoniously with your recipes. Hence the importance of knowing how to chop garlic correctly.


Step 1: Prepare the garlic clove
The first step, simple but essential: separate the garlic clove from the bulb. You may have heard that to make this easier, simply tap the clove lightly with the flat of your knife. That's right! Just place the clove on a cutting board, position your knife flat on top, and apply gentle pressure with the palm of your hand. You'll see, the skin will peel off by itself as if by magic!
"Since I learned this trick, peeling garlic now only takes me a few seconds," says Claire, a passionate cook. And you, are you ready to try this method?
Step 2: Chopping the garlic
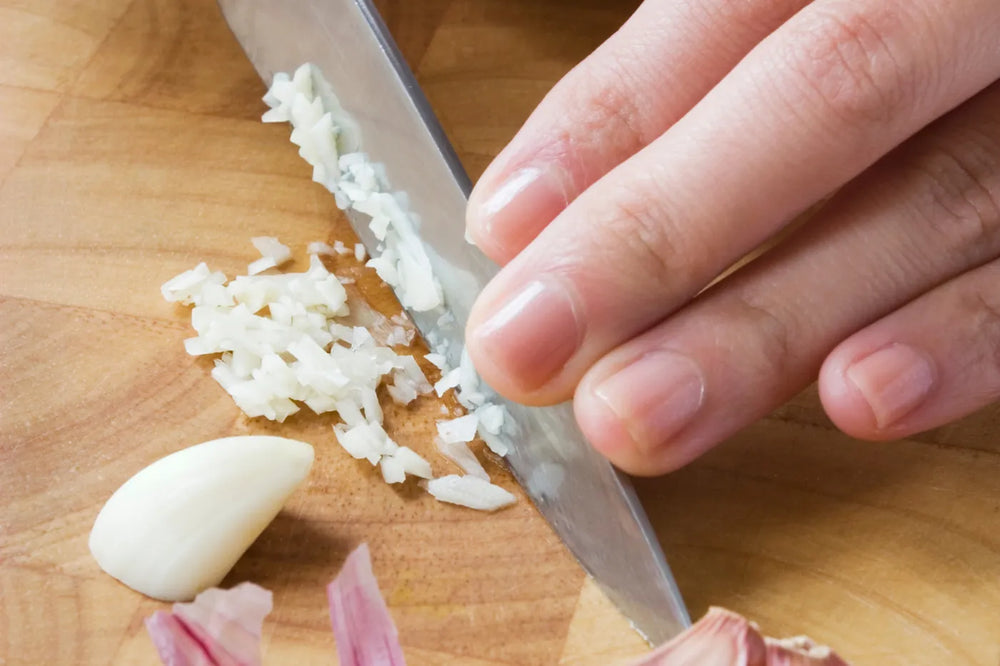
Now that your clove is ready, let's cut it. Start by cutting off the hard end of the clove, the part that was attached to the bulb. Then, to mince the garlic, use the tip of your knife to make several small slices lengthwise along the clove, and then repeat in the other direction, as if you were making a grid.
Once you've made these cuts, begin chopping, holding the knife firmly with one hand while keeping the other hand on the tip to ensure good control. This is where the famous rocking motion comes in: move the knife up and down, rocking it slightly from side to side to chop the pieces finer and finer.
A bonus tip
Do you prefer your garlic even finer, almost like a purée? Sprinkle a little salt over the garlic cloves before chopping them. The salt acts as an abrasive, and you can then use the flat of your knife to crush the garlic against the cutting board. The result is a perfect garlic paste, ideal for sauces or marinades.
Step 3: Use a garlic press (optional)
If hand-chopping garlic seems too tedious, there's a shortcut: a garlic press. It's a super handy tool for getting finely crushed garlic without having to get out your knife. Simply place the clove (peeled or unpeeled, depending on the model) in the press and press! The garlic will come out finely chopped or crushed, ready to use. Be careful, though: pressed garlic tends to release even more flavor, so go easy to avoid overpowering your dish.
"I prefer a garlic press because it saves me time," admits Julien, a fan of Mediterranean cuisine. And you, garlic press or knife?
Step 4: Store the chopped garlic
You might be in the habit of chopping more garlic than you need. Don't worry, there's a solution to avoid wasting it! You can store chopped garlic in the refrigerator in a small airtight container for 1 to 2 days. For longer storage, you can even freeze small portions in an ice cube tray. A handy tip for having garlic on hand at all times!
Conclusion: A small gesture that makes all the difference
As you've seen, mincing garlic is far from complicated. With a little practice, you can do it quickly and efficiently, adding unparalleled flavor to your dishes. So, ready to put these tips into practice and impress your guests with your culinary skills? Whether you opt for a knife or a garlic press, you now have all the tools you need to mince garlic like a pro. Go ahead, get cooking!
And you, what is your favorite technique for chopping garlic?

This site is protected by hCaptcha and the hCaptcha Privacy Policy and Terms of Service apply.